Configure Full (Strict) Cloudflare SSL for an Azure App Service Website
As you hopefully all know, it really is important that your website uses HTTPS. This used to involve a rather cumbersome process of buying and installing a custom SSL certificate. But with an Azure App Service hosted website with a custom domain, there are now a few free options available.
You can automate the process of getting a free certificate from Let's Encrypt, and there is also a very nice new preview feature of App Service that offers free auto-renewed SSL certificates (although unfortunately it doesn't support naked domains yet).
My favourite option at the moment however is to use Cloudflare which is remarkably easy to migrate to assuming you've already set up your domain name to point at your Azure Website. Instructions on how to do that are available here if you need help with that.
Cloudflare not only gives you a free SSL certificate, but keeps it auto-renewed, and also offers some added-value free services such as caching content to reduce the amount of traffic hitting your website.
I recently decided not to renew a paid-for SSL certificate for one of my Azure hosted sites and switch it over to the Cloudflare free offering. I ran into a couple of minor gotchas along the way, so I thought I'd take the opportunity to write up what learned.
The first step was straightforward - I onboarded the domain name at Cloudflare in the usual way, and it read my existing DNS entries, and gave me the new Cloudflare nameservers to configure for my custom domain.
However, things didn't go as smoothly as normal, with a nasty ERR_SSL_VERSION_OR_CIPHER_MISMATCH showing whenever I tried to access my site over HTTPS.
Gotcha 1 - verifying the domain name
My first attempt at fixing the issue was going to my Azure Website and removing my old certificate binding to my paid certificate. I then unbound the custom domain and attempted to rebind it to the website. However, I then ran into another issue - I couldn't verify the custom domain. The Azure Portal asks you to create a DNS entry that it uses to verify ownership of the domain. For example, it might ask you to create a CNAME with the value of mywebapp.azurewebsites.net.
It's quite simple to create the CNAME record in the Cloudflare control panel, but Azure App Service won't see it by default, if the "proxy status" is set to "Proxied". You need to set it to "DNS only", and then your ownership can be verified. You can set it back to "proxied" immediately after if you want.

I was able to resolve this issue thanks to this helpful answer at Stack Overflow.
Gotcha 2 - re-issue Cloudflare universal certificate
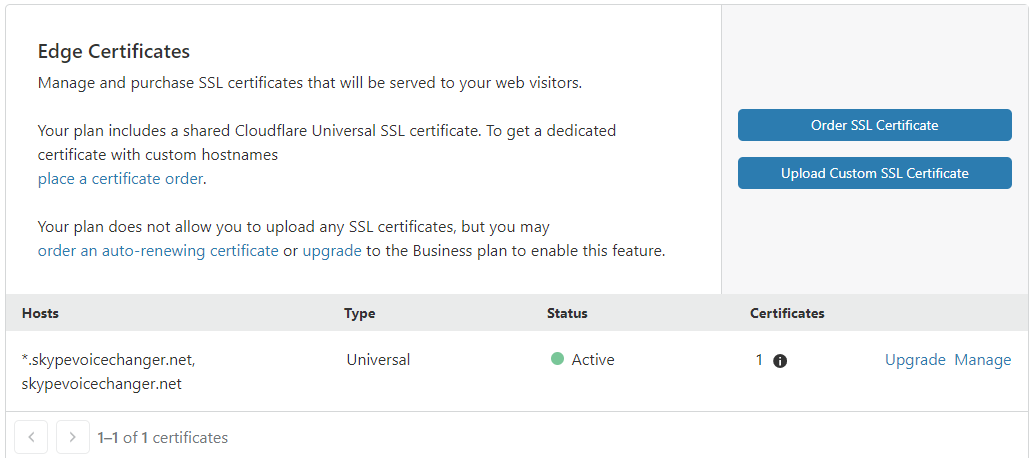
I still hadn't fixed the ERR_SSL_VERSION_OR_CIPHER_MISMATCH and that turned out to be due to my Cloudflare universal certificate not having been issued properly for some reason. Normally, in Cloudflare you will see something like this with a universal certificate for your domain name (skypevoicechanger.net in this example)
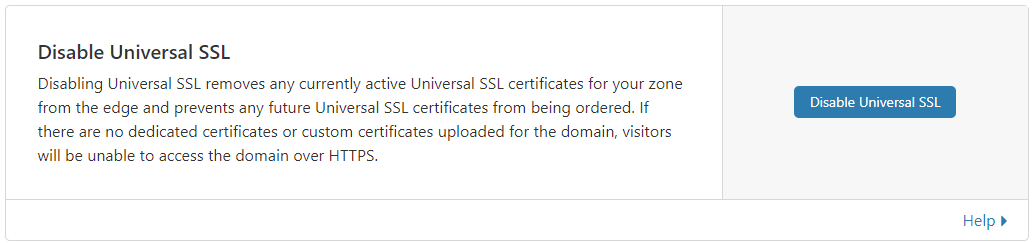
However, if you don't have any universal certificates showing here, then you need to go to this part of the Cloudflare control panel and select "Disable Universal SSL". Then after 10 minutes, re-enable it, and your universal certificate should get generated.
That got me up and running again and resolved the ERR_SSL_VERSION_OR_CIPHER_MISMATCH problem.
Getting to full (strict) encryption mode
The final step I wanted to take was to use the "Full (Strict)" encryption mode, rather than "Full".
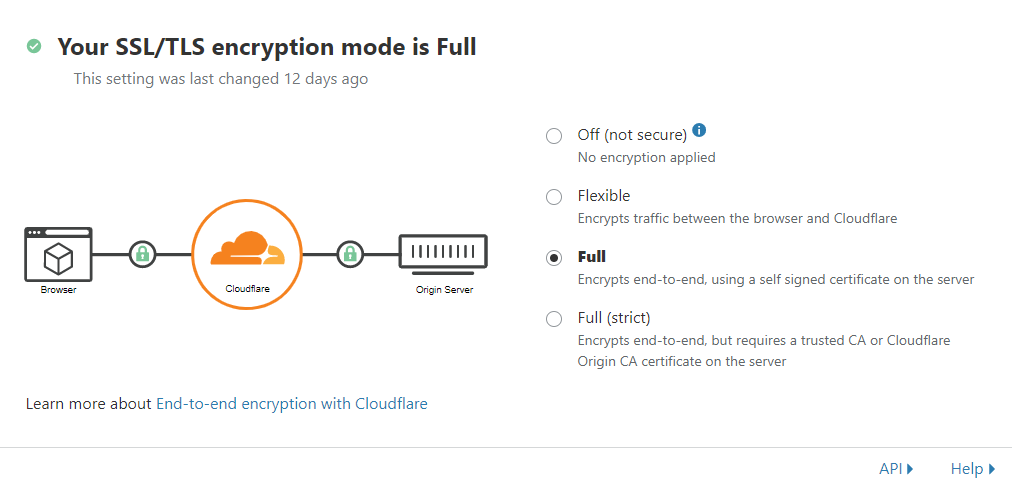
Essentially what happens in "Full" mode is that traffic from Cloudfare to your host server is encrypted, but isn't too fussy about whatever certificate it receives on the host server. This works fine with App Service, because it does have an SSL certificate for mywebapp.azurewebsites.net, although obviously it doesn't have one for your custom domain.
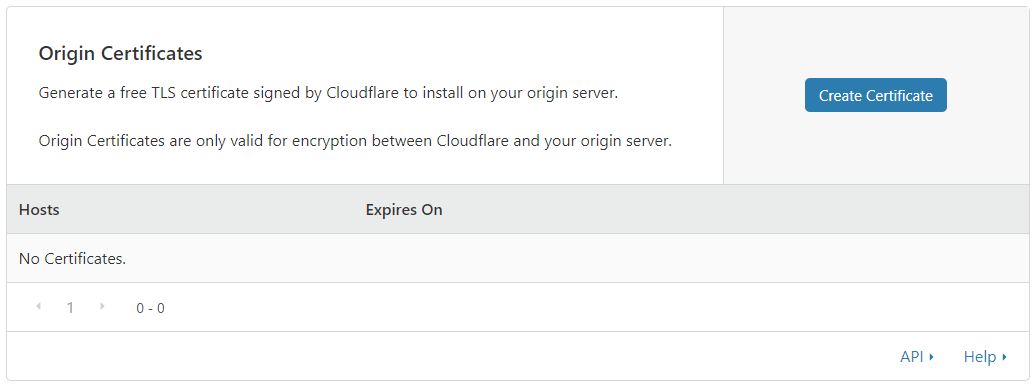
To get the best possible security, you can ask Cloudflare to create a certificate for you (which has a long lifetime), and then install that manually on your Azure App Service Web App.
Creating the Cloudflare "Origin certificate" can be done from their control panel here:
By default this wwill create a certificate with a 15 year lifetime:
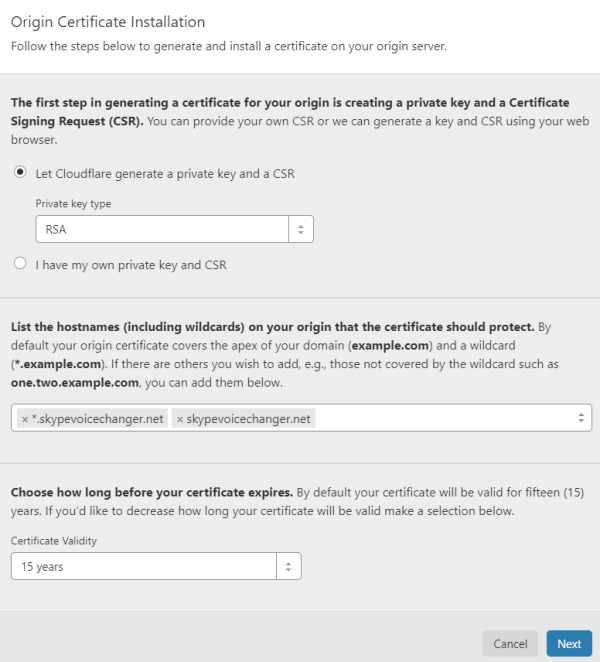
The certificate consists of two parts, one called the "PEM" and one called the key. You should copy these and save them each to a text file.
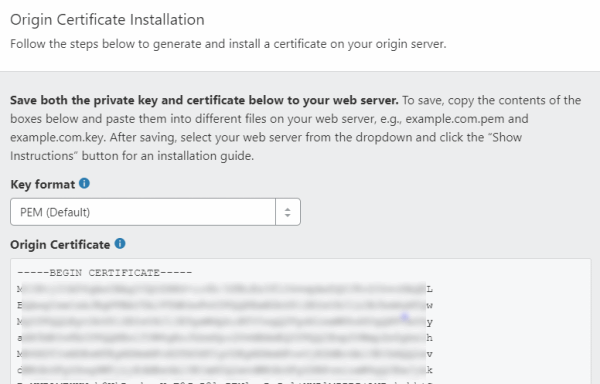
In theory now we should simply be able to install this certificate onto Azure App Service, but there is one final step we need to do, and that is convert it to pfx format. That's needed because that's the format Azure App Service expects the certificate in.
Gotcha 3 - creating a pfx
You can convert a PEM certificate to pfx using openssl, although if you are on Windows, that's a bit of a pain, because it's not available out of the box. However, the Windows Subsystem for Linux is ideal for this.
I opened up a Windows Terminal WSL tab, and changed directories to the folder I'd saved my PEM and key files in:
cd /mnt/c/Users/markh/Documents/
Next, I issued the following openssl command to convert from PEM to pfx. openssl is available out of the box in WSL.
openssl pkcs12 -inkey mykey.key -in mycert.pem -export -out mycert.pfx
This will prompt you for an "export passport" - so enter something secure that you'll remember.
Now we can install this certificate on our Azure Website. We go into "TLS/SSL certificates" and choose "Upload Certificate"

This lets us upload the pfx we just created. You'll need to enter the certificate password you just created.

Then in the "bindings" tab, we can add a binding for each domain name (I added both the naked domain, and the www subdomain)
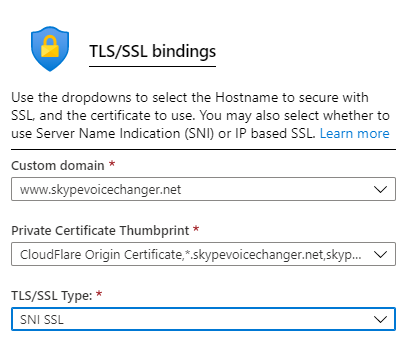
With these bindings in place, we can now go back to Cloudflare and switch over to Full (strict) mode

And so now we have free SSL/TLS for our domain name with nothing additional to be done for the next 15 years (by which time hopefully the Azure App Service free certificates will be upgraded to support naked domains)!
By the way, while I was getting all this working, I found this very helpful tutorial that helped me through a few difficulties along the way. In it the author walks through many of the same steps, only using Win32OpenSSL instead of WSL.
Comments
Thanks for this
Ryan JohnGreat article, thank you.
MilanThank you! The openssl conversion was what I needed!
Daniel HutmacherThank you for this clear explanation!
Bron SquireYou are my lifesaver!
Jesse Gador